10 Ways Teachers Can Unleash the Power of Appsheet
AppSheet lets teachers build their own apps without code! Here are 10 ways to use AppSheet for teachers for custom classroom solutions.

AppSheet lets teachers build their own apps without code! Here are 10 ways to use AppSheet for teachers for custom classroom solutions.

The simple shortcut Ctrl+L might seem insignificant, but it can be a powerful tool in a student-centered classroom.

Chrome is always improving. If you use Chrome for the classroom you will want to check out these essential updates.

The secret to feeling more confident on the computer is keyboard shortcuts! Here are 30 Keyboard Shortcuts That Teachers Need

Have a lot of tabs in your Google Sheets spreadsheet? Here is how to hide all tabs at once, quickly.
Take Desmos Classroom even further with the computation layer. Customize your lesson with the CL.

Desmos Classroom is a FREE tool that allows you to gain real time insights into student thinking during a lesson.
Analyzing AI Created Rubrics: Discover the critical elements of effective rubrics and how to assess the quality of AI-generated options.
Pixel Art in Google Sheets is really fun, but how do you know what number corresponds to what color? Add a color key in pixel art.
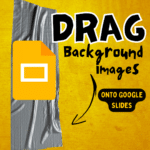
Huge time saver, this drag to background feature in Google Slides is amazing. Check out how to quickly set a background image.
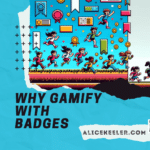
Why gamify with badges? Providing a visual display of student achievement can be fun and motivating.
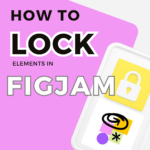
FigJam is a collaborative whiteboard. It makes sense when collaborating or sharing with students to have elements locked down.

I was making a Harry Potter themed Quizizz and was sharply reminded that ChatGPT does NOT think. Use AI but be careful trusting the output of AI. ChatGPT is not thinking

Google Forms is amazing, however, there is so much more we can get out of Google Forms. Check out these 5 Hidden Features in Google Forms

ChatGPT is an example of generative AI that is changing how we teach and learn. However, Google has it’s own version called Google Bard. Here are 5 ways that Google Bard is better than ChatGPT

For funsies, would you like to make your Google Slides in curvsive? I have updated Randomize Slides to have a feature that turns all of your textboxes into cursive.

Free EVERFI K12 course to teach high school students about the dangers of vaping. Incorporates into ANY curriculum. If you are looking for a free vaping course this is it!

Student engagement isn’t just a nice-to-have, it’s the lifeblood of effective education. Yet, it feels like a mythical beast. Something every educator worldwide is chasing, but only a few can say they’ve truly captured. So, what makes this beast so tricky to tame? Let’s go on an adventure, breaking down the barriers to student engagement and, most importantly, arm ourselves with the tools to tackle these head-on. There is no magic bullet for student engagement. Here are some suggestions for SOME ways to address Student Engagement