


This blog post shows the old Google Forms, interface will be slightly different but concepts are still the same. Click Here for information on creating a Google Form with the new interface. Click Here for 5 things you may not know about Google Forms. Google Forms has updated to natively add grading to Forms.
Want More Help with This? Become a Premium Member
Formative Assessment Quizzes with Google Forms
The purpose of formative assessment is not to put a grade in the gradebook. When we are teaching we want to collect evidence and data as to how the students are understanding the material. We then use that evidence to form or change what we do next. Formative assessment can take many shapes: observations, checks for understanding, asking questions, and quizzes. I am against putting grades in the gradebook for formative assessment. (Note, Edsby allows teachers to record formative assessment in the gradebook but does not count it against the grade.)
An excellent tool for formative assessment is Google Forms. Good formative assessment allows you to be quickly responsive to student needs. Google Forms gives you the data from students instantly after they press submit. Since all student answers are together in one spreadsheet it is easy to quickly get a snapshot of how the students are understanding.
While Google Forms is excellent for formative assessment, it is not a full functioning quiz tool. Features such as multiple versions, question banks, setting a time limit, etc… are not currently features of Google Forms. The advantage is the ability to quickly create a formative assessment, rapidly respond to data, and it is stored in Google Drive for easy access.
Google Drive
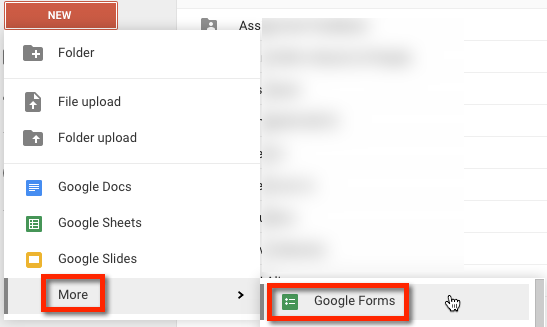
Google Forms is part of the Google Apps available in Google Drive. Click on the “New” button. Under the “More” slider is the option to create a Google Form.
Google Form Settings
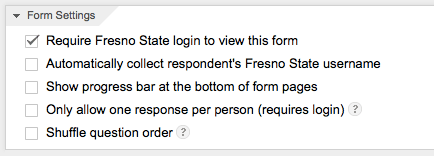
The Google Form edit screen shows the Form settings right at the top. My general suggestion is to leave all the checkboxes unchecked. There are good reasons to select them sometimes, but usually I do not use any of them.
[expand title=”Click Here for more explanation on Form Settings”]
1) By default, if you are on a Google Apps Domain, the form requires students to be on the domain to fill out the form. There are advantages and disadvantages to using the checkbox. If you are a 1:1 classroom, requiring login helps you know who filled out the form. The downside is it can take longer for students to fill out the form if they are not logged into their accounts. Parents are also not able to view the form.
2) The second checkbox collects the email address of the student. This is great for identifying the student who submitted the form and also for emailing back feedback.
3) The progress bar only shows the progress of pages. If you do not have a lot of pages in your Google Form I would not recommend using this option.
4) If students are logged in you can restrict them to only taking the quiz one time. There are many reasons a student may make a mistake and have to fill out the quiz a second time. Since Google Forms automatically collects the timestamp of when the student submitted I will simply not count multiple submissions.
5) Since we are using the Google Form as a quiz it makes sense to want to scramble the question order. This will randomly place the questions asking for the student’s name and other demographic information. Since formative assessment is intended to quickly respond to students understanding it might make more sense that everyone’s question #3 is the same. This makes it easier to say “Okay, many of you struggled with question #3, let’s go over this together.” If the question order is scrambled, it is more challenging to refer to the questions the students took.
[/expand]
Title the Quiz
Giving the quiz a title will also name the Google Form the same name. You can edit the Form name to be different than the quiz title. Below the quiz title is a place for “Form description.” Use this box to give students directions or information they need to fill out the quiz.

Create a Question
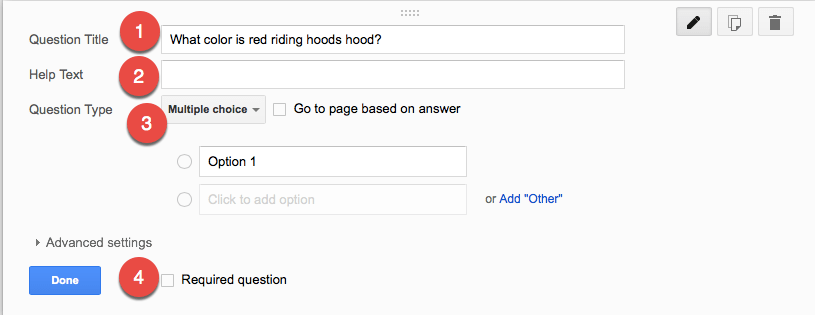
1) The “Question Title” is what is displayed to the student on the Google Form and is used as the column header in the spreadsheet.
2) The “Help Text” is only displayed to the student. This can be used to give clarifying directions about the question. The help text does not show up in the spreadsheet of data.
3) The default question type is multiple choice. Click on box that says “Multiple Choice” to choose a different question type. You can change any question to a different format at any time.
4) Use the “Required question” checkbox to require all questions. The advantage to doing this, besides ensuring that students answer all questions, is it helps prevent students from accidentally submitting the form prematurely.
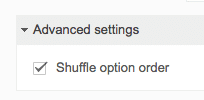
Advanced Settings
Clicking on “Advanced settings” for a multiple choice question allows you to shuffle the answer choices.
No Rich Text
Google Forms does not support rich text editing. This means your questions and answers can not contain bold, underline, italics, emoticons or images.
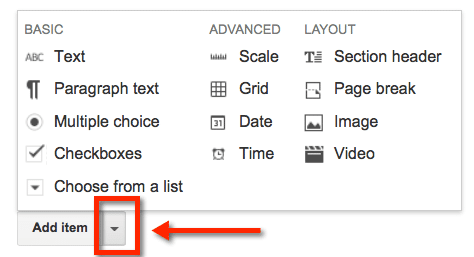
Additional Questions
To add additional questions click on the arrow next to the “Add item” button. This will reveal question options and formatting options.
[expand title=”Click Here for information on question options.”]
1) Text: Creates a small text box for free response. You can have over 50,000 characters in a student response, most likely students will not exceed that.
2) Paragraph text: Creates a large text box for free response. The only difference between “text” and “paragraph text” is the size of the box.
3) Multiple choice: It is multiple choice. Only one answer can be selected. There is an option to allow the student to add “other.”
4) Checkboxes: Creates a multiple choice question. Students can select more than one answer. There is an option to allow the student to add “other.”
5) Choose from a list: Is a multiple choice question; however, not all of the answer choices are visible until the student clicks on a drop-down menu. Only one answer choice can be selected.
6) Scale: Rating scale. For example, on a scale of 1 to 10…
7) Grid: Creates a rubric style question. Allows students to evaluate multiple criteria against a scale. Note that you can not add the rubric text into the grid question.
8) Date: This forces students to submit an answer in a date format.
9) Time: This forces students to submit as a time format.
10) Section header: This is not a question type, but rather a formatting option. Break up the quiz into sections by inserting section headers.
11) Page break: This creates pages. If you have 50 questions on your quiz you may want to break it up into chunks. Creating pages also allows you to create branching questions. If students answer correctly they go to the next page. Answer incorrectly and they go to a page with an explanation of the incorrect answer.
12) Image: Images are important for formative assessment. While you can not insert images into the question themselves, you can insert images above the question. “Refer to the image above.” You can resize the image by clicking on the inserted image and grabbing the resizing handles. Adjust to desired size.
13) Video: You can insert a YouTube video into the Google Form. Currently, ONLY YouTube videos are supported at this time. This is great to use for flipped teaching. Embed a video into the Google Form and create questions to demonstrate that they watched the video.
[/expand]
Marking the Correct Answer
Google Forms is not a quiz tool. The ability to mark the right answer in Google Forms is not an option. Using the Flubaroo Add-On or writing formulas in the spreadsheet will allow you to score the questions.
Edit a Question
To edit any question, simply click on the question to return to edit mode.
Demographic Questions
Do not forget to include questions asking for: Student first name, student last name, student email address, student ID number, period or section.
Tip: Ask for first and last name separately. This allows you sort the spreadsheet alphabetically by last name.
Moving Questions
The question order in a Google Form can be moved around. Click on a question to place it in edit mode. Hover over the top part of the question to reveal some “grippy dots.” Click and hold down on the grippy dots. Drag the question into place.
Confirmation Page
At the bottom of the edit screen are confirmation screen options. When students submit the Form, their answers are sent to the spreadsheet and they are shown a screen that confirms they submitted. The default confirmation text can be replaced. I like to direct students as to what to do next after they are finished with the quiz.

[expand title=”Click Here to explain the confirmation screen checkboxes.”]
1) “Show link to submit another response” gives the student the option to take the quiz again. If students are sharing a device having this link available makes it easy for the next student to take the quiz.
2) There are very few reasons you would want to display the summary of results to the students. The second option shows the answers of the other students. This is helpful when voting on homecoming theme, not as helpful when the Google Form is being used as a quiz.
3) The option to edit responses after submitted gets complicated. Students have to retain their specialized link and be logged in for this option to work. In general, I do not recommend using this option.
[/expand]
Live View
Notice at the end of the URL of the Form you are editing it says /edit. DO NOT SHARE THE /EDIT URL with the students. They will not be able to take the quiz.
In the toolbar is an option to “View live form.”

You will notice that the quiz is now formatted nicely since you are no longer in edit view. This is the URL that you distribute to students. I use Control L to highlight the URL. Control C to copy the URL. In Google Classroom I will create an assignment and use the LINK option to link to the live view of the Google Form.
https://docs.google.com/forms/d/1w0cNeKwzwdQfe_WJ_iki5JvH5-0_13W8ROdrZAKR46I/viewform
Send Form Button
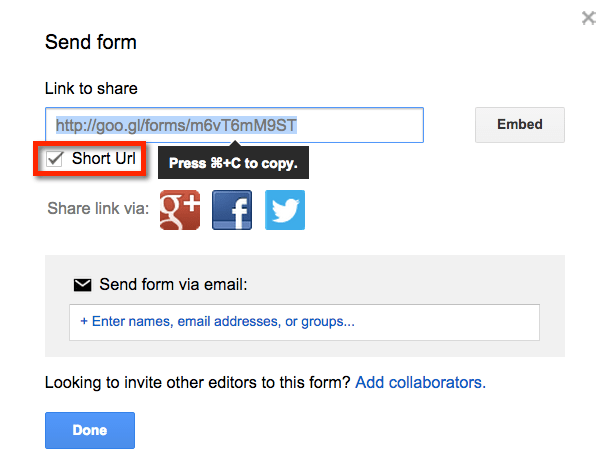
Alternatively, you can click on the blue “Send form” button to obtain the sharing link. This pop up window will give you the link to share with students. Check the checkbox for Short Url to create a cleaner link to share. Use Control C to copy the link. You can also obtain the Embed code this way if you want to embed the form into your website.
View Summary of Responses
A quick way to view the data from the Google Form is to view the “Summary of Responses.” In the edit view go to the “Responses” menu. Choose “Summary of responses.”

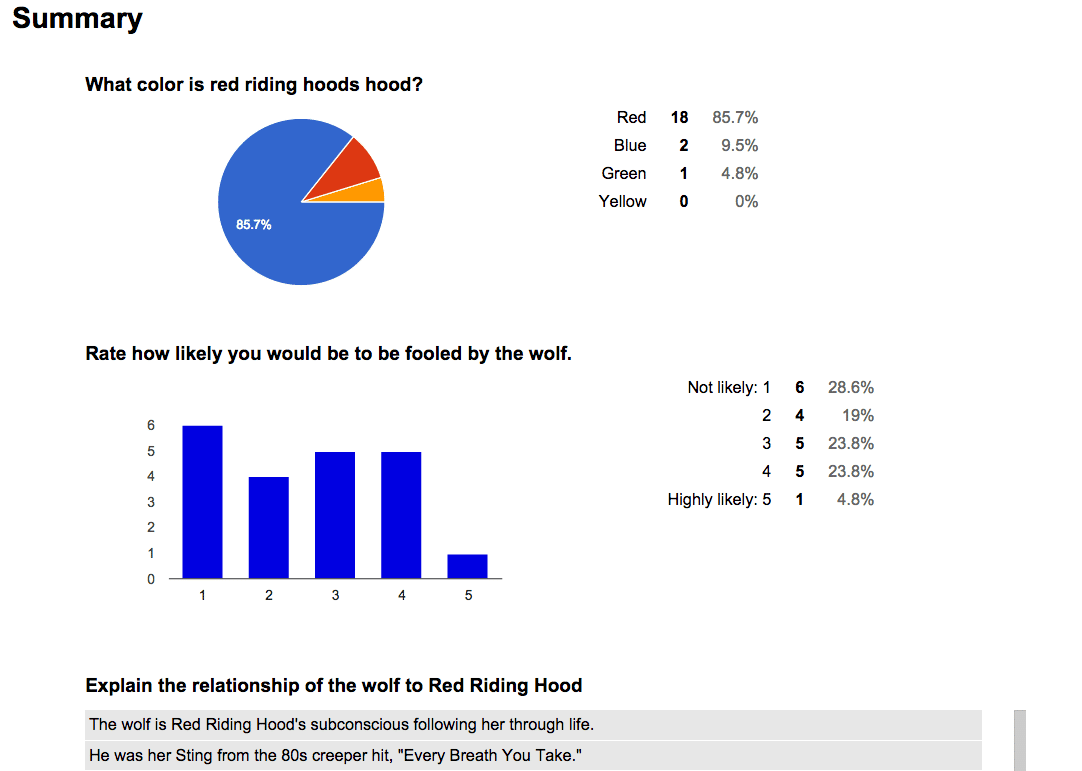
This will automagically create summary charts and graphs of your quiz. This is an easy way to see if your students are “getting it” or not. View the summary of responses here.
View Spreadsheet
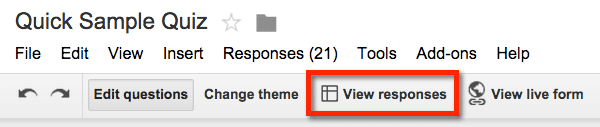
The summary of responses can also be located in the spreadsheet. From the edit screen click on “View responses.” This will link you to the spreadsheet of data. You can also find the spreadsheet in your Google Drive.
As students submit the form the answers will populate in the spreadsheet. You can watch the answers roll in.
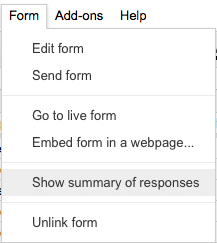
Summary of responses can be accessed through the “Form” menu in the spreadsheet.
Delete Summary of Responses
Deleting the responses from the EDIT view does NOT remove the answers from the spreadsheet. If you teach multiple sections and want to use the same Google Form for a formative assessment quiz, you will want to go to the EDIT view of the form. Under the responses menu is the option to “Delete all responses.”
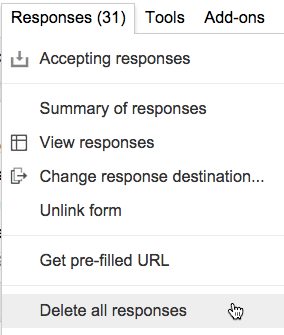
After each period, delete the responses from the Form. Use the summary of responses each period to make decisions on what are your next steps with those students. All student responses from all periods remain in the spreadsheet. Information is not lost.
Formative Assessment Tips
My previous blog post on 8 Google Forms Formative Assessment Tips provides some additional tips that will help you to rock giving formative assessments.


6 thoughts on “Google Forms: Create a Formative Assessment Quiz”
I have a question regarding google forms with self grading using flubaroo. Once the students have submitted the responses, I can see them in my response form, however, is there a way students can see what they submitted? I would like them to be able to see which questions they got incorrect without having to go through me.
There is an option in Flubaroo to send students their answers.
Does Google forms self-grade any quizzes? If not, is there a self-grading extension? Flubaroo?
Thank you for all of your expertise!
Flubaroo is the way to do it.
I’m experimenting with forms for formative assessment. One big component of my formative assessments in the past has been handing back their quizzes and discussing problems as a class or individually. How to you solve the issue of return students’ work when you use a form?
You could use Autocrat if you wanted.